

Sealants: The Added Link in Prevention
Course Number: 673
Course Contents
Resin-Based Sealant Procedure
| Step One – Clean the Tooth Surface The tooth surface must be thoroughly cleaned prior to the placement of the sealant. Cleaning can be accomplished using hydrogen peroxide, a toothbrush, a prophy cup or brush, or a prophy jet. Products containing fluoride and/or glycerin are contraindicated and should not be used to clean the tooth. After cleaning, the surface should be rinsed approximately 20 seconds. An explorer should then be used to examine the entire tooth surface for any remaining debris and previously undetected pathology (Figures 7 8). If debris remains, the tooth surface should be cleaned again. If pathology is detected, the decision to seal the tooth should be reevaluated. | 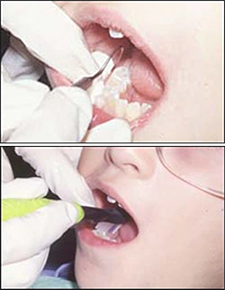 Figures 7 - 8 Figures 7 - 8 |
| Step Two – Isolate the Tooth Surface Isolation is the most critical issue in the proper placement of resin-based sealants. If the surface of the etched tooth is contaminated by saliva, the resin material will not adhere because the remineralization process begins as soon as saliva touches the etched surface. Sealant loss and immediate failure of retention are most often linked to moisture or salivary contamination. A rubber dam is the ideal method for tooth isolation for RBSs sealants, but it is not always possible or appropriate for young children. Cotton rolls, dry field pads, dry field kits, suction isolation systems, and single tooth isolation are all used with success. Figure 9 illustrates acceptable isolation methods. | 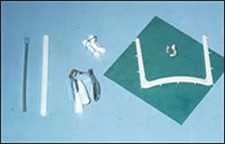 Figures 9 - Isolation Methods Figures 9 - Isolation Methods |
| Step Three – Etch the Tooth Surface Etching the surface of the tooth is accomplished by using 38% phosphoric acid. The acid use in etching the tooth has the additional benefit of killing the bacteria in the pit and fissures. This acid is available in liquid and gel. If a gel is used, it is important to use a gel product that is specifically designed for pit and fissure sealants. Other gels may be too viscous and will not flow properly into the pits and fissures. The etching time is approximately 20 seconds for both primary and permanent teeth (a minimum of 15 seconds and maximum of 60 seconds). Figures 10-11 illustrate the placement of acid on the tooth surface. Use extreme caution when handling phosphoric acid etch to avoid any contact with the skin. Be cautious of splatter or etch getting on gloves, a rubber dam, suction tip, or other item that might accidentally contact the skin, which could cause a chemical burn. If phosphoric acid accidentally contacts the patient’s skin, rinse with copious amounts of water and inform the parent or guardian to watch for signs of skin irritation. | 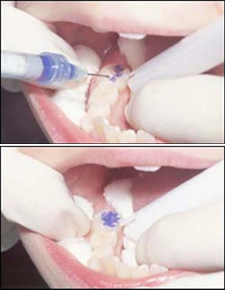 Figures 10 - 11 Figures 10 - 11 |
| Step Four – Rinse and Dry the Tooth Surface After etching for at least 15 seconds, the surface needs to be rinsed with water to remove the acid. Suction and air should be used to thoroughly dry the etched tooth surface. Again, it is extremely important to avoid salivary contamination. If the tooth surface is contaminated by saliva, it will be necessary to repeat the etching process, this time etching for 5 seconds (Figures 12-13). • A properly etched surface will appear chalky (Figure 14). • A microscopic view of an etched tooth surface (Figure 15) | 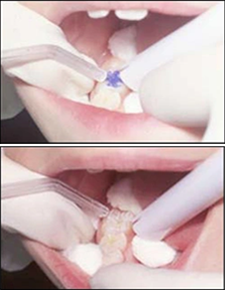 Figures 12 - 13 Figures 12 - 13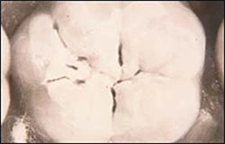 Figure 14 - Properly etched surface. Figure 14 - Properly etched surface.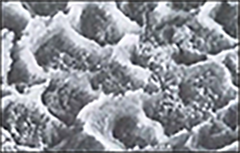 Figure 15 - Microscopic view. Figure 15 - Microscopic view. |
| Step Five – Apply the Bonding Agent/Primer (Optional) Place a thin layer of bonding agent, gently thin bonding agent with air; cure according to manufacturer’s instructions. This step is optional. Some manufacturers will recommend the use of a bonding agent to increase the retention of the sealant. | |
| Step Six – Apply the Sealant Material It is important to be familiar with the particular sealant material being used. Some clinicians find it helpful to place a photocopy of the manufacturer’s instructions on the tray set-up and review them before beginning the procedure. Sealant material is placed on the prepared tooth using a syringe (Figure 16). Regardless of how it is delivered, it is important to limit the amount of material. The sealant material should be placed only in the pits and fissures. Too much material can result in occlusal interference. Over manipulation of the product may result in bubbles. Although occlusal interference is not a major concern, the amount of material should also be limited when sealing pits and fissures on lingual and buccal surfaces. | 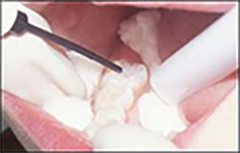 Figures 16 - Placing sealant material with syringe. Figures 16 - Placing sealant material with syringe. |
| Step Seven – Curing the Sealant After the light cured sealant material is applied and the operator is satisfied all surfaces are coated using the correct amount, the sealant should remain undisturbed for 10-20 seconds before applying the curing light. This delay allows the resin to flow into the etched surface. Light cure for the amount of time indicated in the manufacturer’s instructions, typically 20 seconds. The tip of the curing light wand should be held approximately 3 to 5 mm from the surface of the sealant (Figure 17). | 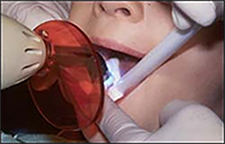 Figures 17 - Curing light wand positioning. Figures 17 - Curing light wand positioning. |
| Step Eight - Evaluate the Sealant Immediately after the material has cured the sealant should be evaluated for retention, flaws, and occlusion. Use an explorer to check for retention and flaws. If a sealant is going to fail, it most likely will do so immediately. If there are bubbles, voids, or any portion of the material comes out, more sealant material may be added. It will be necessary to re-isolate and etch before placing the material again. The occlusion of the sealant should be checked with articulating paper (Figures 18-19). If there is any indication of interference, the excess sealant material should be removed using a round finishing bur in a high or slow speed handpiece. | 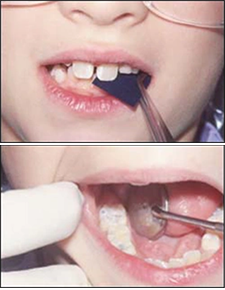 Figures 18 - 19 Figures 18 - 19 |
Some additional recommendations:
Treat one quadrant at a time when placing resin-based sealants to reduce risk of saliva contamination
Use of an assistant and four-handed dentistry can expedite the process and help ensure proper technique, particularly when isolation is critical.
Patient and clinician should wear safety goggles.
Resin-based sealants should NOT be applied to partially erupted molars.
0/16Next