

Non-Metal Clasp Dentures
Course Number: 650
Course Contents
Fabrication of NMCDs (Non-rigid)
The procedural steps for the fabrication of NMCDs (non-rigid) are essentially the same as those used for the fabrication of an acrylic partial denture with orthodontic clasps. In addition, NMCDs may be fabricated digitally using an intraoral scanner and computer-aided design and computer-aided manufacturing (CAD-CAM) technology.
The procedure for the fabrication of a conventional interim NMCD is outlined below:
| 1. Make impressions of the maxillary and mandibular arch (Fig. 10) (using alginate or Vinylpolysiloxane (VPS) in stock trays. Pour the impressions in type III stone and generate casts. Fabricate a record base with a wax occlusal rim and register the interocclusal records. |  Fig. 10 - Mandibular alginate impression Fig. 10 - Mandibular alginate impression |
| 2. Mount the casts on the articulator using the interocclusal records. Verify the presence of adequate vertical restorative space (Fig. 11). | 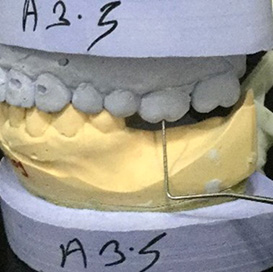 Fig. 11 - Vertical restorative space assessed with a periodontal probe Fig. 11 - Vertical restorative space assessed with a periodontal probe |
| 3. Survey the cast and determine the extent of the undercut on the abutment teeth (which will aid in thermoplastic resin selection) (Fig. 12). | 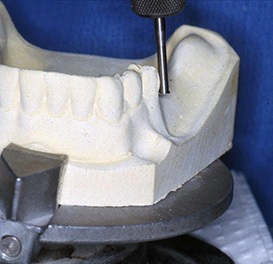 Fig. 12 - The cast is surveyed to determine the extent of the undercut Fig. 12 - The cast is surveyed to determine the extent of the undercut |
| 4. Perform the mouth preparation, if needed. A new impression will be required following the mouth preparation (Fig. 13). Pour the impression in type III stone and generate the master cast. Fabricate a record base with a wax occlusal rim and register the interocclusal records and mount the cast on the articulator using the interocclusal records. | 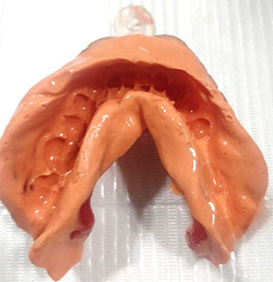 Fig. 13 - Master impression Fig. 13 - Master impression |
| 5. Select the shade and mold of the prosthetic teeth using the natural teeth as a guide, make diatorics, and set the prosthetic teeth on the trial denture base (Fig. 14). Note: Acrylic resin teeth do not form a chemical bond with flexible denture base resin. Instead, they are secured mechanically by creating T-shaped diatoric holes (retento-grip technique), allowing the denture base resin to flow into and lock the teeth in place.48 | 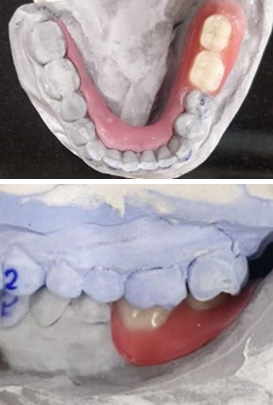 Fig. 14 - Prosthetic teeth waxed to the trial denture base Fig. 14 - Prosthetic teeth waxed to the trial denture base |
| 6. Verify the esthetics, occlusal vertical dimension, and centric occlusion during the wax-try-in procedure. Once the try-in is approved by the dentist and the patient the design cast (Fig. 15), mounted maxillary cast, and the mandibular cast with the teeth set up are sent to the laboratory for the fabrication of the NMCD (Fig. 16). | 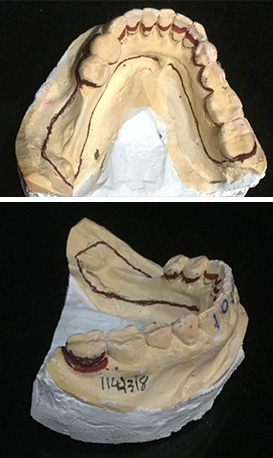 Fig. 15 - Design cast Fig. 15 - Design cast |
| 7. Laboratory Fabrication of the NMCD (Fig 16) |  Fig. 16 - Interim NMCD Fig. 16 - Interim NMCD |
| 8. During the NMCD placement appointment, immerse the prosthesis in hot tap water for 60 seconds before inserting it in the patient’s mouth (Fig. 17). This may help in achieving the same flexural modulus as the NMCD would have at body temperature and thus aid in improved patient adaptation (information from vaplast.com.) | 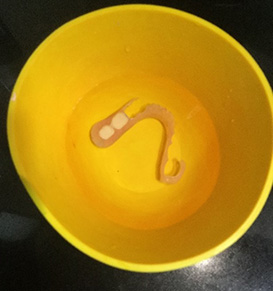 Fig. 17 - NMCD placed in hot water for 60 seconds Fig. 17 - NMCD placed in hot water for 60 seconds |
| 9. If a clasp fits too tightly in the patient’s mouth, place the resin clasp in hot tap water for approximately 30-60 seconds (Fig. 18), then bend the clasp outwards and cool it in cold water. If a clasp is too loose, follow the same procedure except, bend the clasp inwards. | 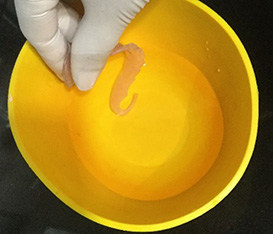 Fig. 18 - Clasp placed in hot water for 60 seconds Fig. 18 - Clasp placed in hot water for 60 seconds |
| 10. Use pressure indicating paste and VPS (vinyl polysiloxane) to determine pressure areas on the denture base and borders respectively. Make adjustments as necessary, however, it is always advisable to use manufacture specified materials for finishing and polishing thermoplastic materials (Fig. 19). A constant motion of the bur aids in achieving a smooth surface that usually does not require repolishing. (Information from valplast.com.). Evaluate the occlusion and make adjustments as necessary. | 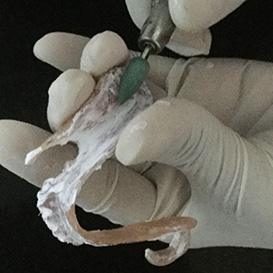 Fig. 19 - NMCD adjusted using manufacturer recommended materials Fig. 19 - NMCD adjusted using manufacturer recommended materials |
| 11. Oral and prosthesis hygiene instructions should be given to the patient. Patients should clean their prostheses daily to remove any tartar or stains using specially formulated cleaning solutions. A soft bristle brush should be used to clean NMCDs.(Fig.20). |  Fig. 20 - Soft bristle brush used to clean NMCD Fig. 20 - Soft bristle brush used to clean NMCD |
0/13Next