

Non-Metal Clasp Dentures
Course Number: 650
Course Contents
Fabrication of NMCDs (Rigid)
Most of the steps/procedures for the fabrication of an NMCD are similar to those used for fabricating a conventional cast partial denture. Few exceptions include the incorporation of thermoplastic resin claps, thermoplastic resin denture base, and the creation of diatorics in the prosthetic teeth.
The clinical and laboratory steps for the fabrication of an NMCD (rigid) are outlined below:
| 1. Make diagnostic impressions with alginate (Alginate impression material, 3M ESPE) in stock trays (Fig. 21) and pour them with type III dental stone. | 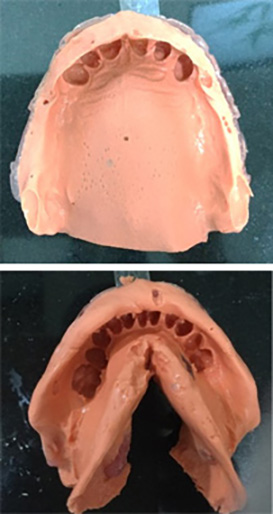 Fig. 21 - Maxillary and mandibular alginate impressions Fig. 21 - Maxillary and mandibular alginate impressions |
| 2. Evaluate the restorative space intraorally (Fig. 22). Register the interocclusal records and mount the casts on a type III semi-adjustable articulator (WhipMix 2240, WhipMiz corp). Verify the presence of adequate vertical restorative space using the mounted casts. | 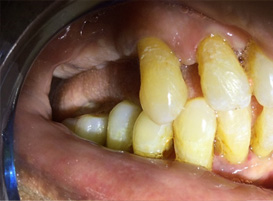 Fig. 22 - Restorative space evaluated intraorally Fig. 22 - Restorative space evaluated intraorally |
| 3. Survey the cast, determine the extent of the undercut on the abutment teeth, and design the framework (Fig. 23). The mouth preparation for an NMCD (rigid) usually involves the preparation of rest seats for support and indirect retention. Occasionally, minor reshaping of the tooth in the area of the survey line and/or guide planes may be required. | 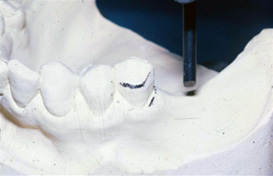 Fig. 23 - The cast is surveyed to determine the extent of the undercut and design the prosthesis Fig. 23 - The cast is surveyed to determine the extent of the undercut and design the prosthesis |
| 4. Following the mouth preparation, make master impressions with alginate/VPS impression material (Fig. 24) and pour the impressions using a type III dental stone (Microstone, WhipMix). | 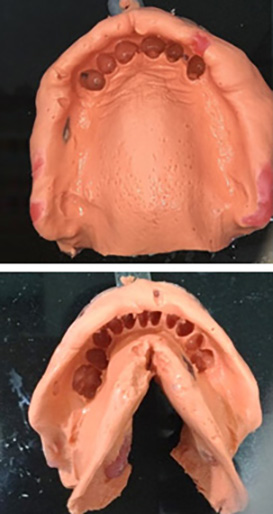 Fig. 24 - Master impressions Fig. 24 - Master impressions |
| 5. Send the definitive casts and the design casts (Fig. 25) to the laboratory along with detailed instructions for framework fabrication (with metal clasps.) The metal claps will help retain the framework during the subsequent clinical procedures. They will be eliminated following the wax-try-in appointment. | 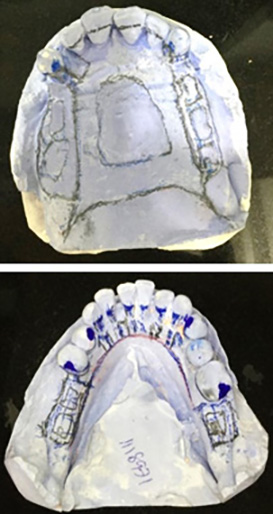 Fig. 25 - Design casts Fig. 25 - Design casts |
| 6. Evaluate the maxillary and mandibular frameworks on the casts for passivity and fit (Fig. 26). Verify complete seating of the rests in the rest seats, intimate contact of the lingual and palatal plating with tooth surfaces, the rigidity of the major connector, and correct finishing and polishing of the framework. | 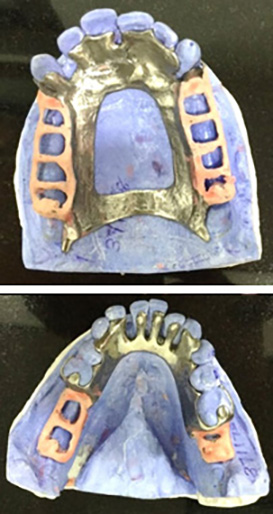 Fig. 26 - Maxillary and mandibular metal framework Fig. 26 - Maxillary and mandibular metal framework |
| 7. Try the metal frameworks in the mouth (Fig. 27). Identify the area of binding/interferences using a disclosing medium (Disclosing Wax, Kerr). Care must be excised when evaluating interferences, areas where disclosing medium has thinned out are not interferences, but, guiding surfaces, and must not be adjusted. |  Fig. 27 - Framework try-in Fig. 27 - Framework try-in |
| 8. An altered cast impression should be made as per the current prosthodontic principles, if the mucosa is loose and unhealthy or if it is not accurately recorded on the mandibular master cast. | |
| 9. Fabricate wax rims and attach them to the framework/s, register interocculsal records using a vinylpolysiloxane(VPS) bite registration material and select the shade for the prosthetic teeth (Fig. 28). | 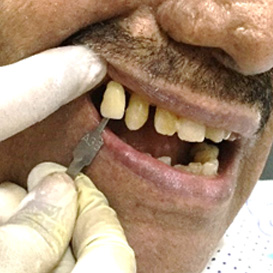 Fig. 28 - Shade selection Fig. 28 - Shade selection |
| 10. Mount the definitive casts on a semi-adjustable articulator using the interocclusal records (Fig. 29). Select the mold of the prosthetic teeth based on the size and shape of the existing natural teeth. |  Fig. 29 - Interocclusal records used for mounting the casts in an articulator Fig. 29 - Interocclusal records used for mounting the casts in an articulator |
| 11. Create diatorics in the prosthetic teeth (to aid in mechanical retention) and then wax them to the frameworks (Fig. 30). | 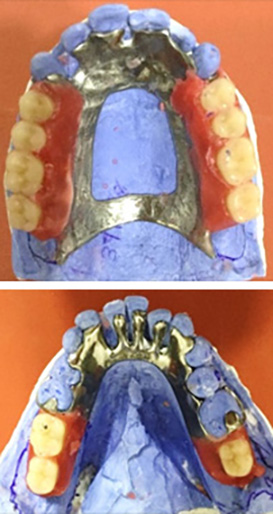 Fig. 30 - Prosthetic teeth waxed to the metal frameworks Fig. 30 - Prosthetic teeth waxed to the metal frameworks |
| 12. Verify the esthetics, phonetics, occlusal vertical dimension, and centric occlusion during the wax-try-in procedure. Once the try-in is approved by the dentist and the patient send the wax-up, master casts and the design casts to the laboratory for fabrication of the NMCDs. The laboratory is instructed to eliminate the metal clasps and incorporate flexible thermoplastic resin clasps in the NMCD design. If deep alveolar undercuts are present cervical to the abutment teeth, the resin clasp may be extended to the tooth adjacent to the abutment teeth, to provide the desired rigidity and strength to the clasp (Fig. 31). Note the clasps are designed such that they cover the cervical third of the abutment teeth, the marginal gingiva, and a part of the alveolar mucosa | 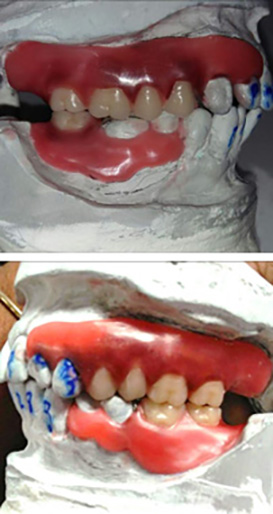 Fig. 31 - Final wax-up Fig. 31 - Final wax-up*Note: metal clasps are eliminated and will be replaced with resin clasps |
| 13. During the NMCD (rigid) (Fig. 32) placement appointment, immerse the prosthesis in hot tap water for 60 seconds before inserting it in the patient’s mouth. This may help in achieving the same flexural modulus as it would have at body temperature and aid in patient adaptation (information from vaplast.com.) | 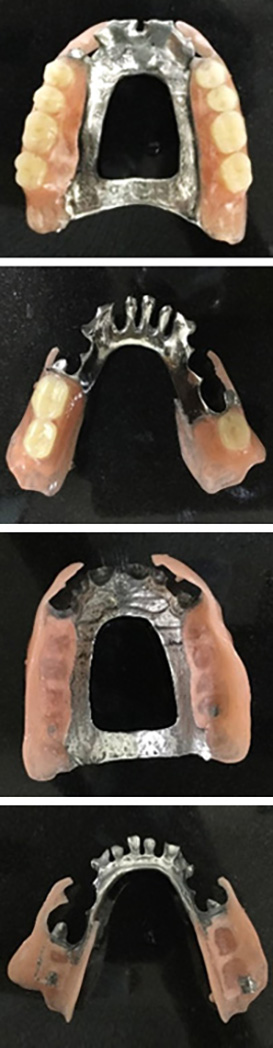 Fig. 32 - Definitive prostheses Fig. 32 - Definitive prostheses |
| 14. Place the prostheses in the patient’s mouth (Fig. 33). If a clasp fits too tightly in the patient’s mouth, place the resin clasp in hot tap water for approximately 30-60 seconds, then bend the clasp outwards and cool it in cold water. If a clasp is too loose, follow the same procedure except, bend the clasp inwards. | 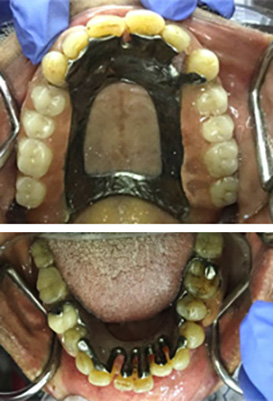 Fig. 33 - Initial placement of the definitive prostheses Fig. 33 - Initial placement of the definitive prostheses |
| 15. Use pressure indicating paste and VPS to determine pressure areas on the denture base and borders respectively (Fig. 34 A). Make adjustments as necessary (Fig. 34 B), finish and polish the prostheses; It is always advisable to use manufacture specified materials for adjusting, finishing, and polishing thermoplastic materials. Divide the appliance into sections and finish/polish one minute per section. A constant motion of the bur aids in achieving a smooth surface that usually does not require repolishing. (Information from valplast.com.) | 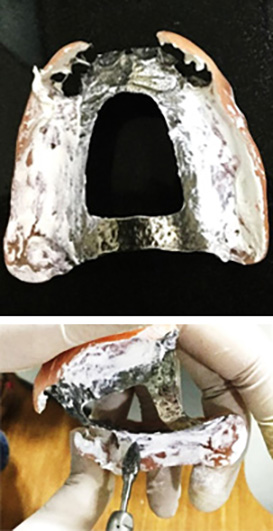 Fig. 34A - Pressure areas identified using pressure indicating paste Fig. 34A - Pressure areas identified using pressure indicating pasteFig. 34B - NMCD adjusted using manufacturer recommended armamentarium |
| 16. Evaluate the occlusion and adjust it as necessary. Educate and train the patient regarding the removal and the insertion of the prostheses and place the prostheses in the mouth (Fig. 35). | 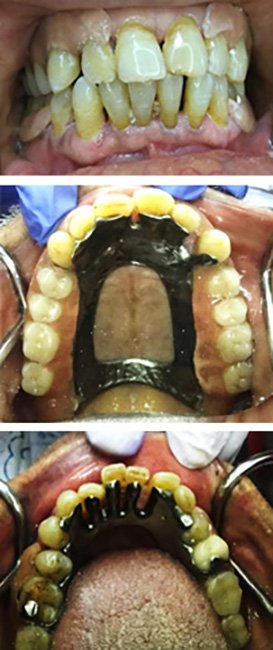 Fig. 35 - Definitive prostheses placed in the mouth Fig. 35 - Definitive prostheses placed in the mouth |
| 17. Oral and prosthesis hygiene instructions should be given to the patient. Patients should clean their prostheses daily to remove any tartar or stains using specially formulated cleaning solutions. A soft bristle brush should be used to clean NMCDs. | |
| 18. The patient should be asked to return in a week for a recall appointment. In addition, the patient should be informed that over a few years, the partial denture may require refinements and adjustments including replacement of worn acrylic teeth and relining procedures due to changes in the denture bearing tissues. |
Polyamide resins are challenging to repair or reline as they do not bond to self-polymerizing resins, and usually, an impression is made and sent to a laboratory to accomplish the same employing reinjection. NMCDs made from polyester or polycarbonate resins can be repaired and relined using the same techniques/procedures that are used for RDPs made from heat-polymerized acrylic resins.