

Digital Dentures
Course Number: 662
Course Contents
4-Step Protocol for Digital Denture Fabrication
❒ During the first appointment, the master impressions are made using the patient’s existing denture; thermoplastic, heat moldable stock impression trays (Figure 6); or custom trays. If custom trays are required, primary impressions are made during the initial consultation appointment and custom trays (fabricated on the primary casts) are kept ready for this appointment.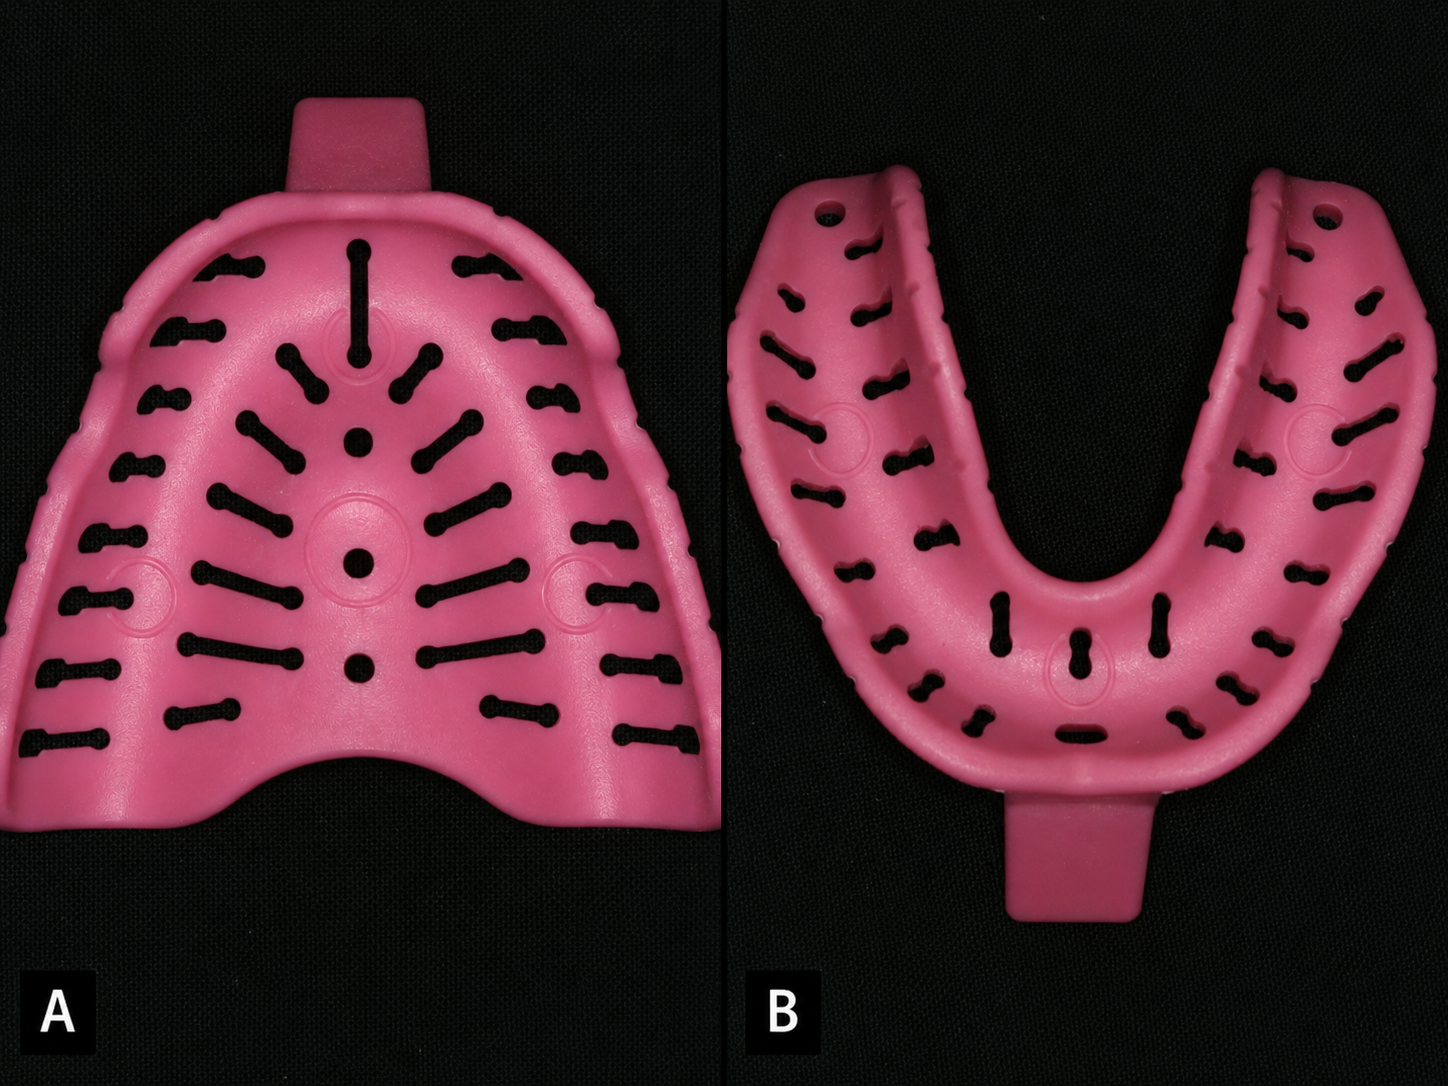 Figure 6. Thermoplastic stock impression trays (A) Maxillary (B) Mandibular
❒ The master impressions (Figure 7) are digitized using intraoral/extraoral scanners. Printed or conventional trial bases with wax occlusal rims are fabricated for the next appointment.  Figure 7. Maxillary and Mandibular master impressions
 |
| ❒ During the second appointment, the shade and the mold of the prosthetic teeth are selected. ❒ Various extraoral and intraoral patient images (for digital smile designing) are recorded. It is prudent to check with manufacturers/laboratories regarding the molds of teeth available in their repository prior to this appointment. ❒ The maxillary wax occlusal rim is adjusted clinically as per the esthetics and phonetics of the patient. ❒ The midline, high smile line, and canine lines are carved into the maxillary wax rim. ❒ An image of the patient smiling with the maxillary wax occlusal rim placed in the oral cavity is recorded (Figure 8). 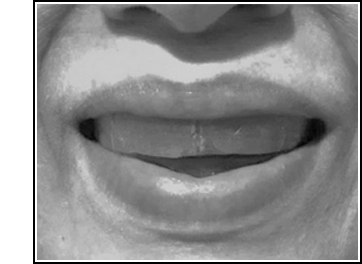 Figure 8. The patient smiling with the maxillary wax occlusal rim placed in the oral cavity
❒ Next, the mandibular wax occlusal rim is adjusted to achieve an optimal OVD and the interocclusal records are registered as per the current prosthodontic procedures (Figure 9). 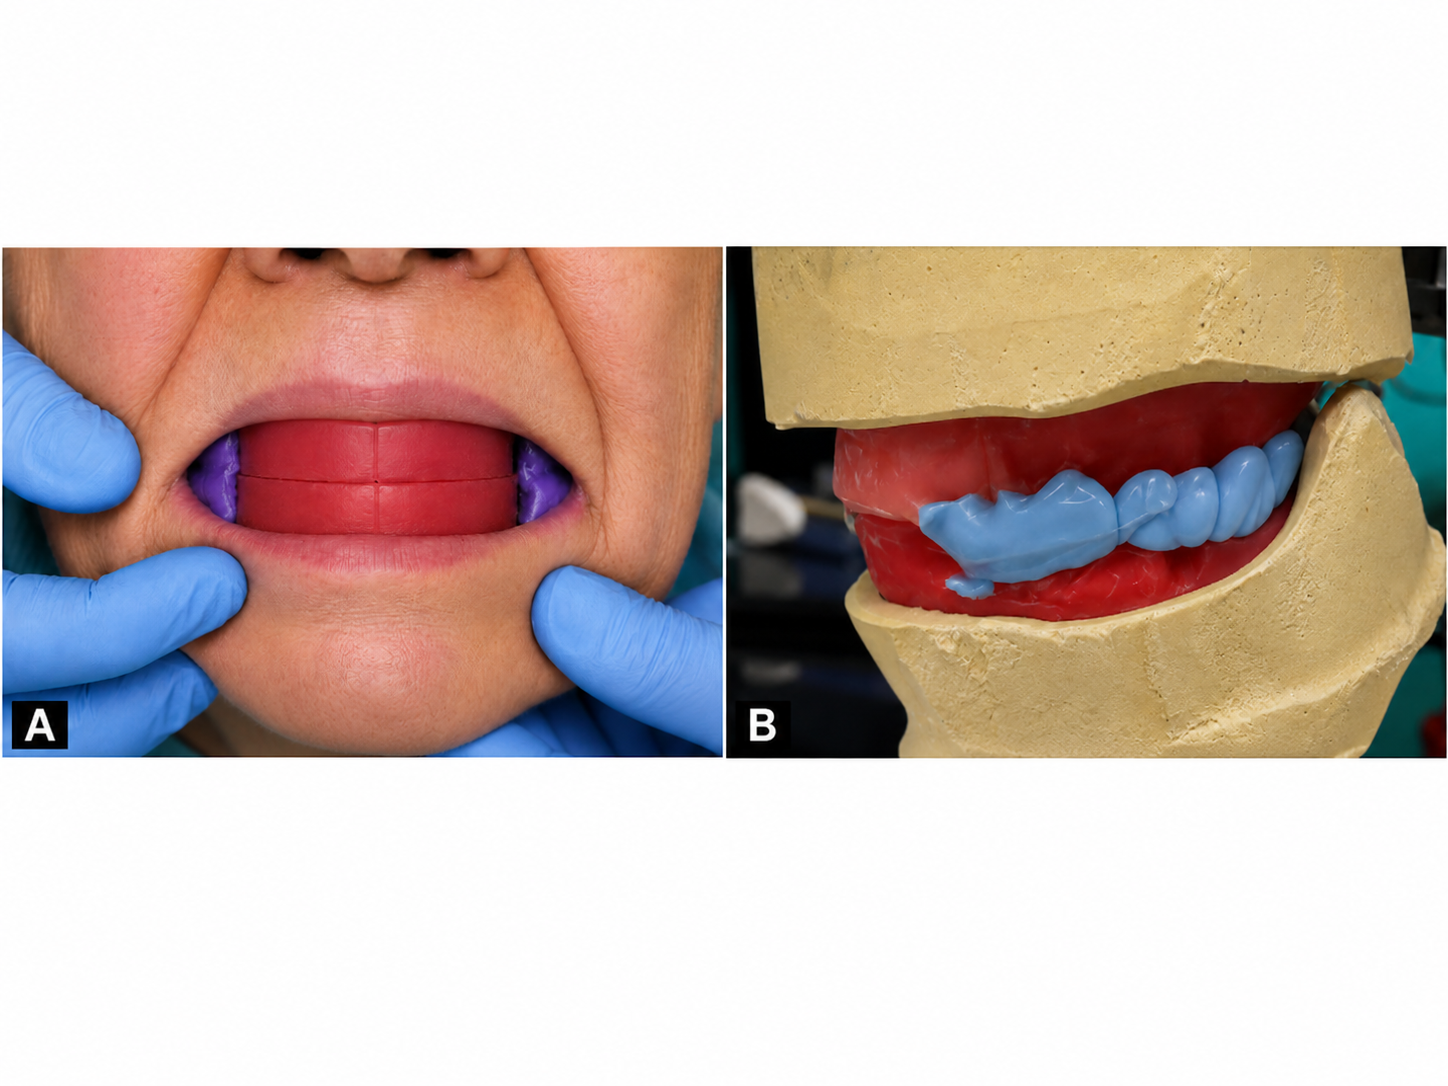 Figure 9. (A) Registration of the interocclusal records (B) Interocclusal records registered
❒ The trial denture bases with the clinically adjusted wax occlusal rims and the records are sent to the laboratory to be digitized using the extraoral scanners. The files are integrated with the digital case and aligned with the digitized tissue surfaces. The dedicated software (CAD phase) is used to appropriately relate the maxillary and the mandibular virtual casts with each other (Figure 10). The ideal path of insertion and the degree of undercut blocking are determined in the software and the functional borders of the denture are designed. The orientation of the occlusal plane is determined by the digitized wax rims. The prosthetic teeth selected are set digitally on the virtual casts and the CAD files are sent to the practitioner for a digital preview of the teeth set-up. Once, the digital preview is approved (Figure 11), a digital prototype is printed for the try-in appointment. 3D printing is generally used to obtain the prototype of the denture as it is generally faster, economical, and easier to use compared to milling. 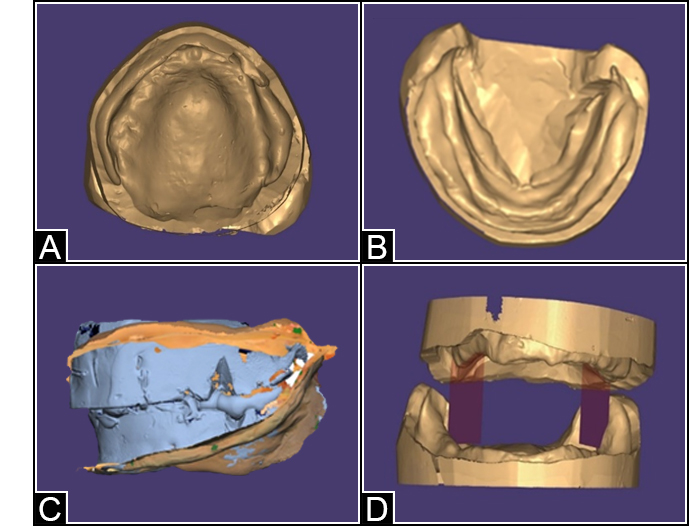 Figure 10. (A) Maxillary and (B) Mandibular virtual casts (C & D) appropriately related to each other
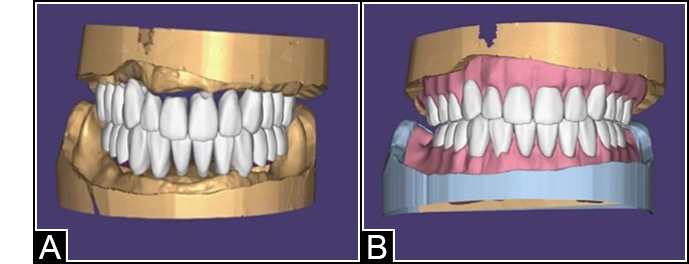 Figure 11. (A) The prosthetic teeth selected are digitally set on the virtual casts (B)
 |
❒ During the third appointment, the entire planning is tested 3 dimensionally using the prototype (Figure 12). The denture prototype helps assess the OVD, CR, phonetics, and the esthetics of the patient. However, it may be challenging to appreciate the esthetics of the printed prototype as it is monochromatic; To overcome this problem, the laboratory may be instructed to apply pink composite on the facial aspect to create the pink part of the denture or replace the printed teeth and the trial base in the anterior regions with the prefabricated prosthetic teeth and modeling wax respectively. However, the latter technique would increase laboratory-related expenses, hence, may be reserved for exacting patients. The try-in protocol for milled/printed monolithic dentures differs from conventional wax try-ins. Adjustments are performed using marking tools (e.g., Sharpies) and rotary instruments (e.g., e-cutters) rather than traditional wax instruments. Clinical adjustments can be carried out by selectively refining the prosthesis. Occlusal corrections are achieved through cusp adjustments/reduction using rotary instruments. Incisal edge or cusp tip reduction may be performed to modify tooth length and correct any cant of the smile line. Discrepancies such as midline position and gingival contour or scallop levels are identified and marked using ink markers to guide corrections. When additions are necessary, wax, acrylic resin or composite resin may be applied to achieve the desired contour and esthetic outcome.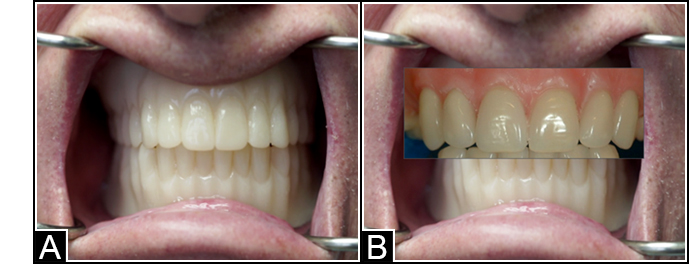 Figure 12. (A) Prototype is tested clinically in the patient’s mouth
 (B) The printed teeth in the anterior regions are replaced with the prosthetic teeth and wax ❒ Changes may be made to the prototype as required. Once the try-in is approved by the patient, the CAD files are sent to the CAM facility for digital denture fabrication. If changes were made to the prototype during the try-in appointment, the clinically adjusted prototypes are scanned again and the data derived from them are used for prosthesis fabrication. Digital definitive prostheses may be fabricated through the milling (subtractive) process or the 3-D printing (additive) process. Several digital denture protocols advocate eliminating the try-in procedure to expedite the fabrication process. However, this may result in poor esthetic outcomes necessitating denture remakes at an additional cost and time. |
❒ During the fourth appointment, the digital dentures are clinically adjusted, finished, polished, and placed in the oral cavity using conventional prosthodontic procedures (Figure 13). However, the process is much faster with digital dentures as the teeth movement during processing is minimal and the fit of the prostheses is superior.15,17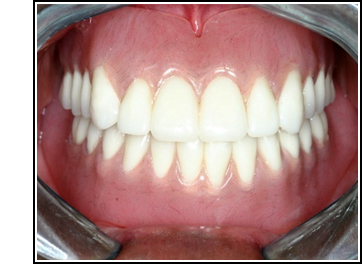 Figure 13. Digital dentures placed in the oral cavity
 |
0/16Next